By Sharon Ladner
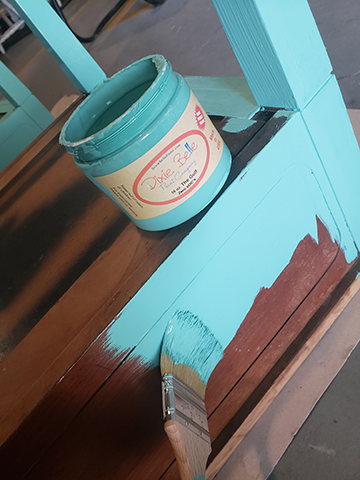
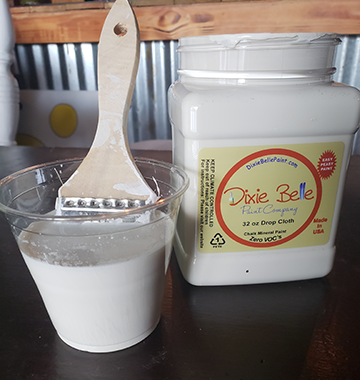
Chalk paint has a plaster-of-Paris medium mixed in the paint to make a self-grabbing product. This allows for less prep work in the beginning. Vintage Flamingo in Gulfport sells Dixie Bell products exclusively at the store for your start-to-finish project.
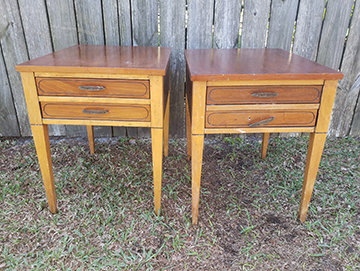
Visit a yard sale, church sale or your favorite resale shop. Find a piece of wood furniture that whispers your name when you stroll by. That is the perfect piece for your DIY project.
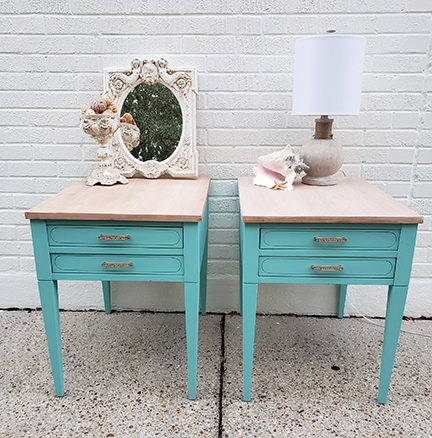
I always sit the piece of furniture in the room where I want it before painting it. I walk by it several times a day and see what color comes to mind within the space. You don’t want to have to repaint your room around one piece of furniture. Hopefully it will speak to you like my coastal end tables.
HERE IS THE PROCESS I USED FOR MY PROJECT
• To prepare for whitewashing the tabletops, I sanded off the old finish using a belt sander to make the process quicker; a palm sander works fine. Wear glasses and goggles while sanding, and sand in the same direction as the wood grain. Sand outside or in a well-ventilated room. I have a furry friend as an audience.
• After sanding, dust the table with a clean, dry paintbrush. Wipe down any remaining residue with a damp cloth. Spread out a tarp or drop cloth when you bring the tables inside to paint. A workspace or garage is ideal to avoid painting in the house.
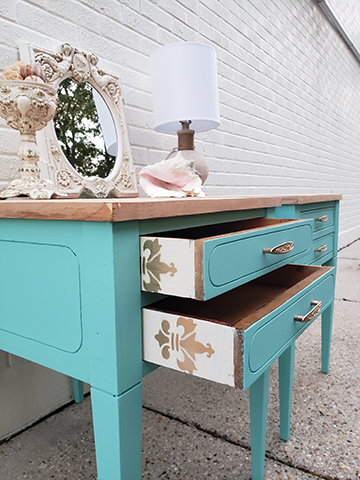
• I start with the feet or base of a project. I flip the tables upside down to ensure I have paint coverage on all legs. Drying time should be considered during a DIY project. Chalk paint is thick, and depending on the original wood color, often only requires one-coat coverage. I like to add two tablespoons of water and put two coats on the surface. If you don’t like brushstrokes in your paint, lightly sand between coats of paint with a fine grit sand paper and a block sander. I started painting the handles during my drying time. I used metallic gold base and top coat on the handles. Once I was satisfied with my paint coverage and color, I flipped the tables over to whitewash.
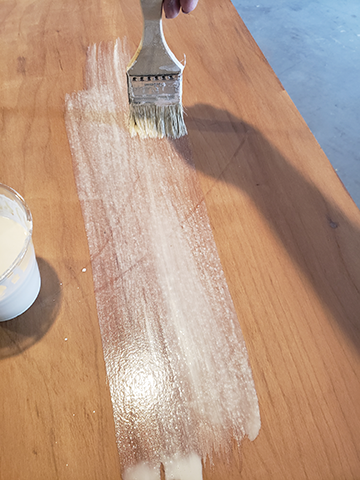
• For whitewash, you need to water down your paint generously. I use a plastic cup, fill it half full of water and dip my paintbrush in the paint once. Then I stir the brush in the water. You can test the color on the back of the piece if you are unsure. If you want it more transparent, add water. To make it less transparent, add more paint. I whitewashed with two coats of the watered-down paint.
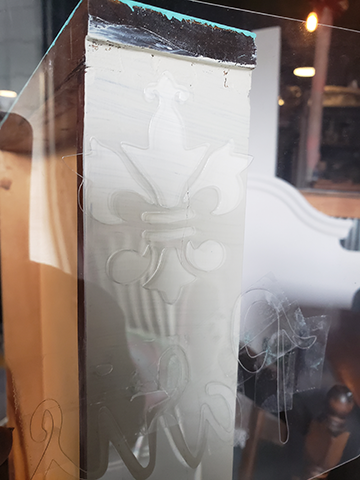
• Feel free to add the element of surprise by painting the inside of the drawer with a bold color or a stencil. Use chalk paint and dab the color over the stencil. Sand it lightly after it dries to create a weathered affect, or just seal it.
• I sealed the tabletop, base and handles with Gator Hide. It’s a water barrier sealant that protects the surface from glass rings, pets and most kids. You can sit your champagne glass right on top of the surface, and it won’t leave a mark. Yes, it is acceptable to toast yourself to celebrate how awesome you are for completing your first DIY project.
Sharon Ladner co-owns Vintage Flamingo in Gulfport with Michelle Jacobs.