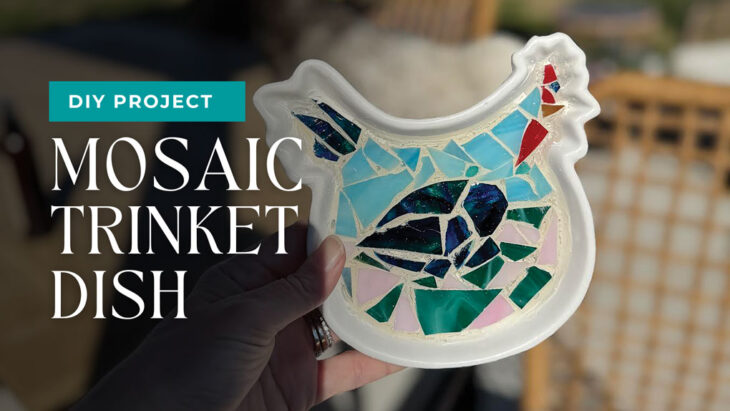
There’s something extra satisfying about turning “cheap and cheerful” into “handmade and heirloom-ish.”
For this project, I grabbed a $3 ceramic dish from Dollar General and used leftover glass scraps to create a bright, one-of-a-kind mosaic trinket tray. It’s the perfect weekend craft — low cost, beginner-friendly and a great way to use up those random bits you can’t bear to toss.
Place your dish by the sink for rings, on a nightstand for earrings or on a desk to catch paperclips and tiny treasures. I may keep this one next to my stove as a spoon holder.
SUPPLIES & MATERIALS:
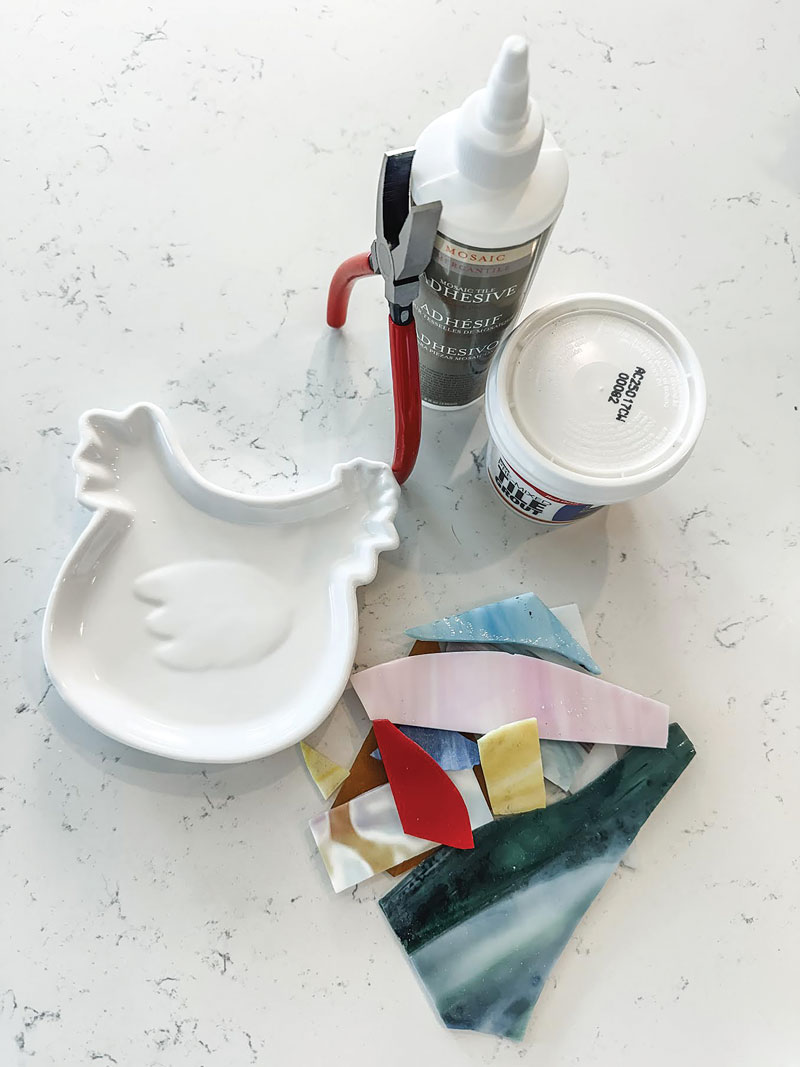 Small ceramic dish (thrifted items, wood and ceramics are perfect)
- Glass scraps (stained glass, broken glass pieces or mosaic tiles)
- Tile nippers (or strong cutters made for glass)
- Safety glasses and gloves (highly recommended)
- Adhesive: E6000, Weldbond or a mosaic-specific glue
- Grout
- Sponge for wiping grout haze
- Paper towel / rag
Optional: grout sealer or UV resin (provides long-term protection)
INSTRUCTIONS:
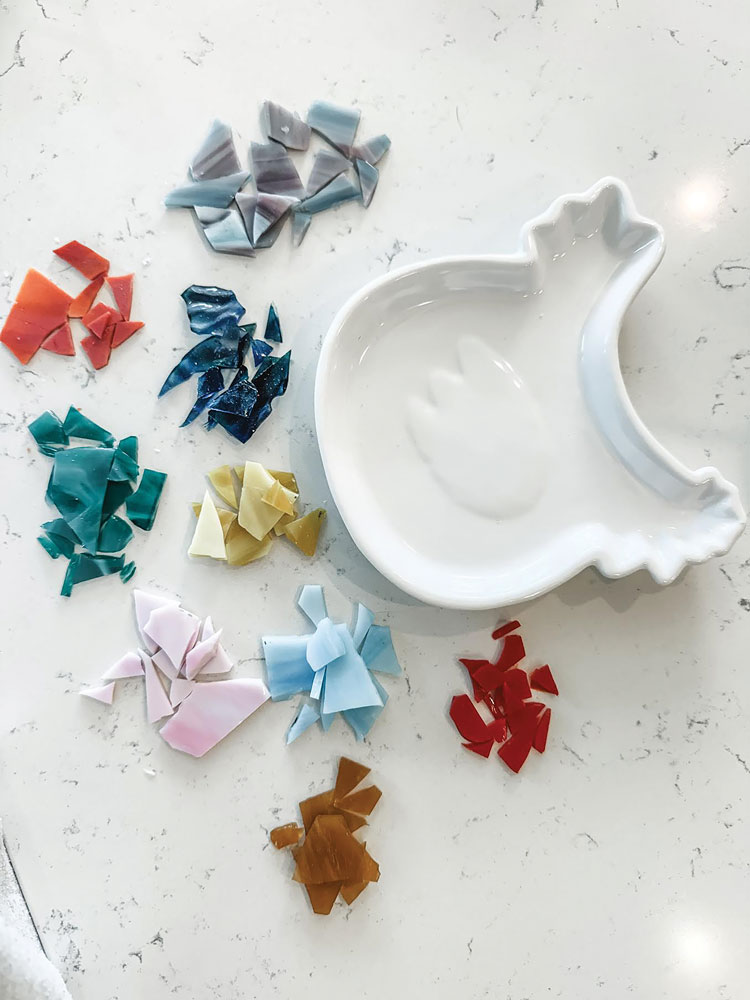
1. Pick your palette and plan your layout
Before gluing anything, lay your glass pieces on the dish to get a rough design. I kept mine simple and bold — chunky pieces in coordinating colors with a darker center for contrast. Don’t overthink it; mosaics are supposed to feel a little playful.
Tip: Place your larger pieces first, then fill gaps with smaller shards.
2. Cut glass scraps to fit
Using tile nippers (and wearing eye protection), trim pieces to fit the curves of the dish. Aim for a mix of shapes and sizes, leaving a little space between pieces for grout lines.
Safety note: Work under a towel or tray so tiny shards don’t travel.
3. Glue your mosaic pieces down
Using a small paint brush, add your glue to the areas of the dish you are ready to work on. Also add glue to the back of each mosaic tile piece and press it onto the dish. Keep building until your design feels balanced. Let it dry completely, following your glue’s dry-time instructions (mine was 1 hour).
4. Grout it
Mix grout to a thick, peanut-butter consistency, then press it into all the gaps using a gloved finger or sponge. Make sure every space gets filled.
 5. Let sit
Leave the dish for about 10–15 minutes (or as directed), then wipe the surface gently with a damp sponge to remove excess grout from the tops of the glass.
6. Buff and clean
After it dries a bit more, buff the glass with a dry paper towel or soft rag to remove any remaining grout haze and make the colors shine.
7. Seal (optional but recommended)
Once the grout is fully cured (your grout container will let you know how long), add a grout sealer for extra durability — especially if your dish will live near a sink. I used UV resin and cured it with a UV light.
ALTERNATIVE IDEAS
Use thrifted China with vintage floral patterns to create a cottage core vibe on just about anything!