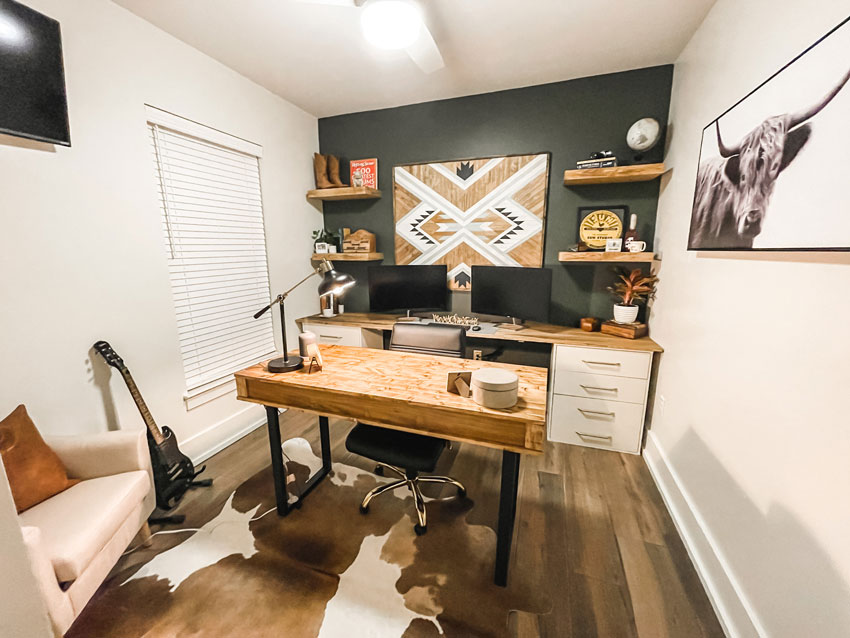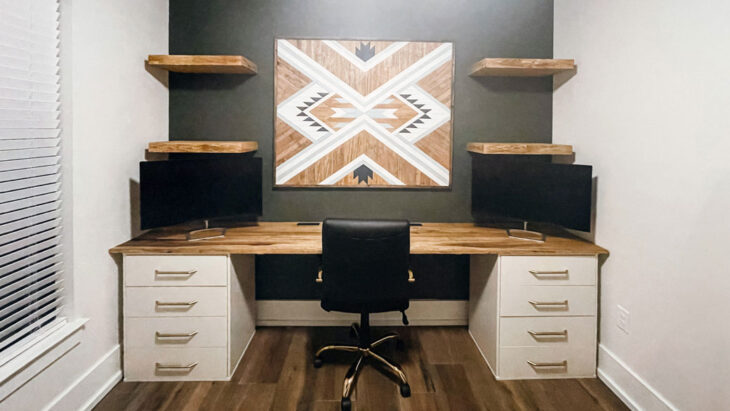
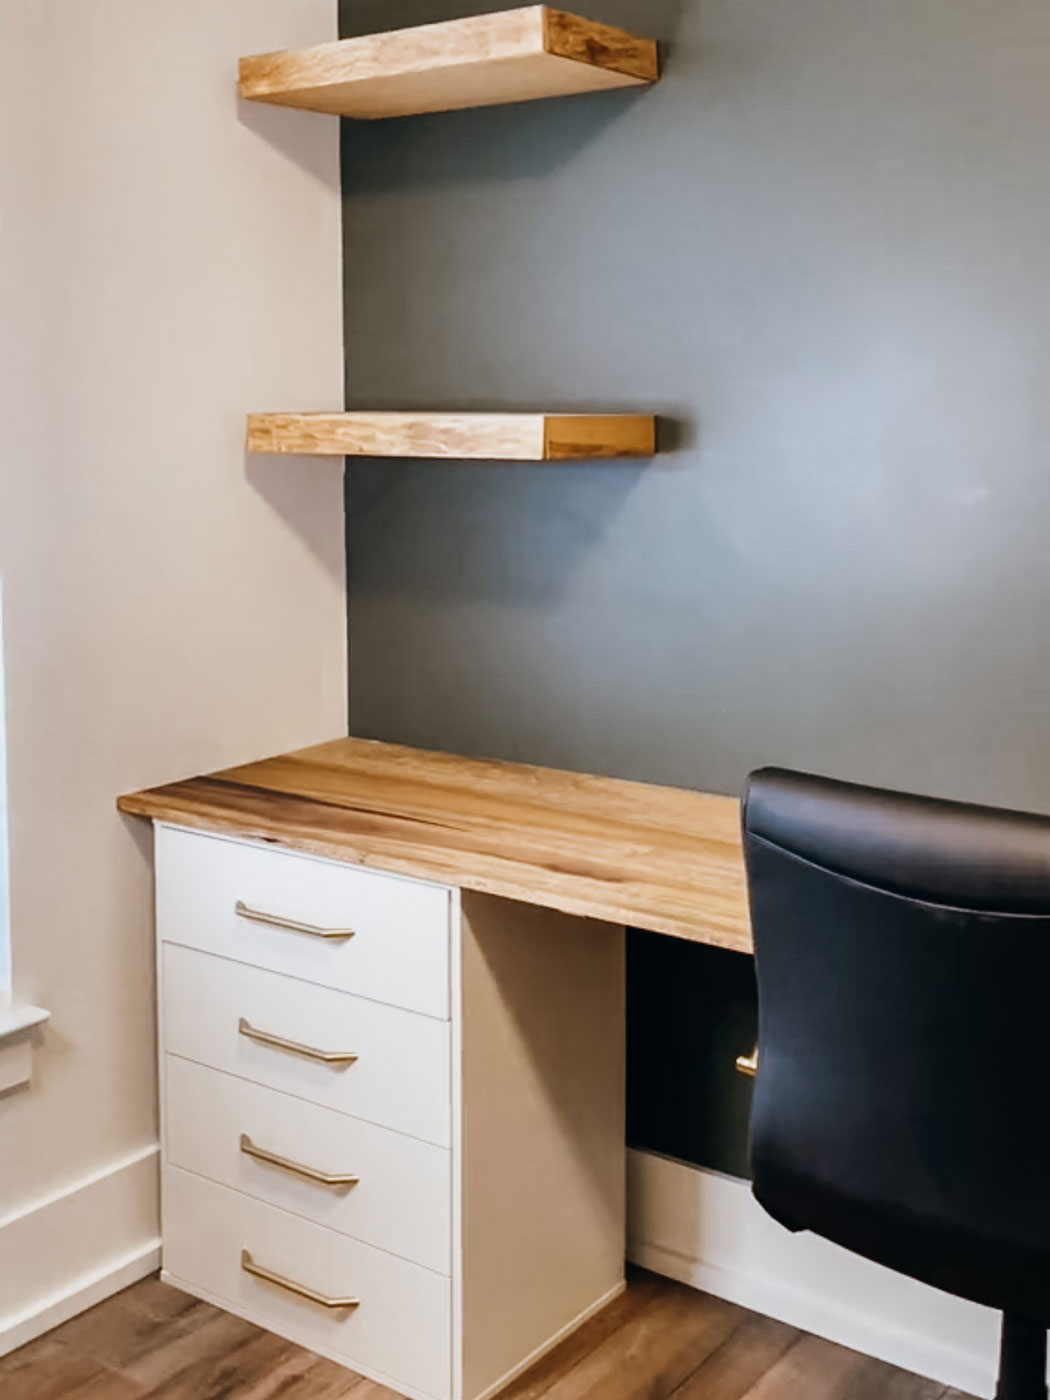
With so many people now working from home, I wanted to share an easy way to make a built-in desk that provides storage and is easy on the wallet. Of course, there are many great desk options available. But with this DIY project, you can create a customized, built-in look — transforming a room with a desk into a beautiful home office space.
WHAT YOU’LL NEED:
- Two matching sets of drawers or bedside tables (These need to be between 28-30 inches in height to reach the standard desk height. You also can add feet to the bottom if you need them to be raised up a few inches.)
- Wood for your tabletop — I used three 1-by-8 strips of poplar, each 10 feet long. You also can buy one full sheet of wood like butcher block, but it’s pricier.
- Two 1-by-2-by-8 pieces of wood for support and braces
- Stain (optional)
- Paint (optional)
- Polyurethane to seal
- Paint and stain supplies (brush, roller, rags and sponges)
- Circular or miter saw (or have the store cut for you)
- Sander (orbital sander or sanding block)
- Sandpaper (220 grit and 440-plus grit)
- Wood screws
- Drill
INSTRUCTIONS:
Step 1
Measure your space and prep your wall for the built-in desk, including paint or wallpaper. Decide how long you want your desk to be. Taking the desk from wall to wall will give it a built-in look.
Step 2
Prep your drawers. The sets of drawers I used from Amazon were white, so I painted them a creamy off–white to create a more custom look. I also changed the hardware from black to gold using spray paint.
Step 3
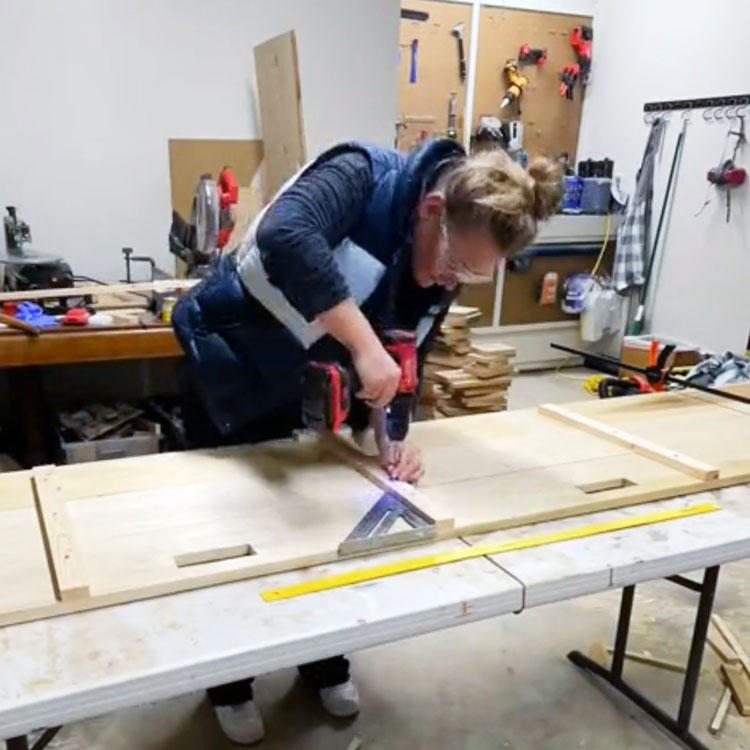
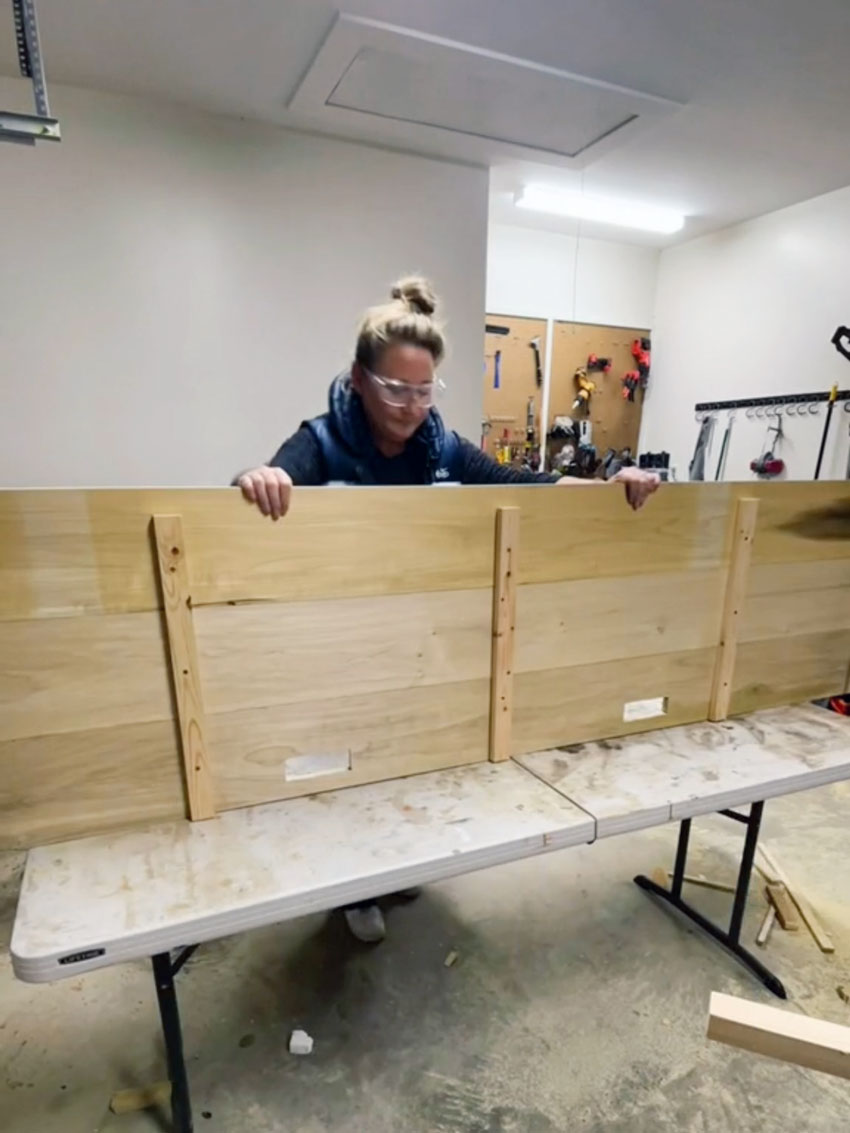
Once you decide how long you want your desk to be, cut your tabletop wood down to the appropriate size. I used a circular saw to cut my three pieces down. Flip your wood over, lining each piece up edge to edge. You can use wood clamps to help you keep them straight.
Add two to three wood braces (cut to size) to the bottom side toward the middle, making sure that they will not be touching the drawers when flipped over. Use wood screws to attach the braces (as seen in the pic). I chose not to use wood glue on this step in case I decide to take this apart and use the wood for something else.
Step 4
Flip your tabletop over and sand with your 220- grit sandpaper. Stain or paint your tabletop your desired color. I used the stain color Puritan Pine by Minwax. Once dry, follow the steps on your polyurethane to seal it, sanding between coats.
Step 5
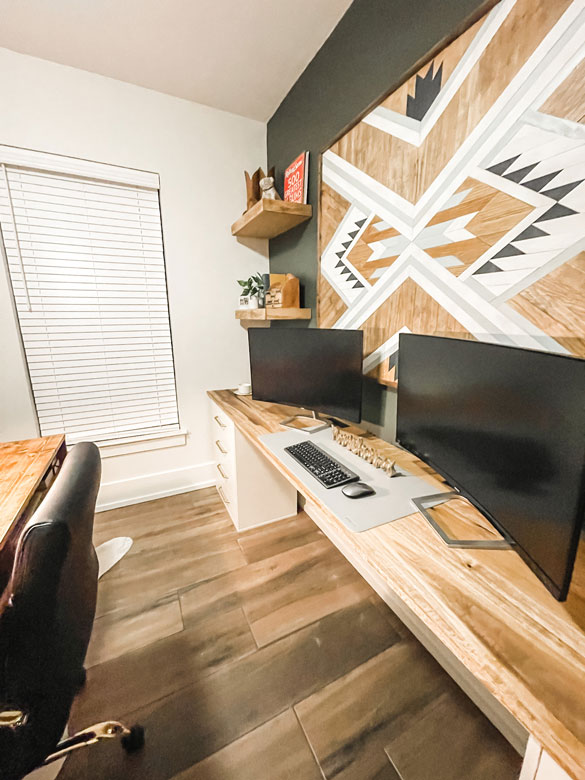
While your tabletop is drying, prepare a support on the wall for your tabletop to sit on. This step is optional, but because my desk is almost 10 feet long, I needed extra support on the backside where computer monitors will be sitting. Find your studs in the wall and add a 1-by-2 for your tabletop to sit on.
Step 6
Once everything is dry, you can lay your tabletop across your drawers. You can secure the tabletop down to the drawers and the back support if you feel like you need the added security. My desk is heavy enough that I did not need to secure it.
TIPS
- Thrift stores often carry matching sets of drawers. A coat of paint and upgraded hardware can really take some inexpensive pieces to the next level, giving them a high-end look.
- You easily can add a recessed power strip by cutting out a rectangle with a jigsaw before attaching your tabletop.