Hate to say goodbye to all those fresh summer fruits and vegetables? Whether you’re a gardener, farmer’s market shopper or do-it-yourself picker at south Mississippi u-pick farms, no one likes to toss out fresh produce that’s past its prime.
Home canning is a way to ensure those vegetables or fruits stay around for months to come. Canning is not difficult, but it does take time. It’s also like a science where deviation from the process is not allowed; shortcuts do not exist. For those who believe fresh is best, it is time well spent.
Here are some recipes to get the canning process started:
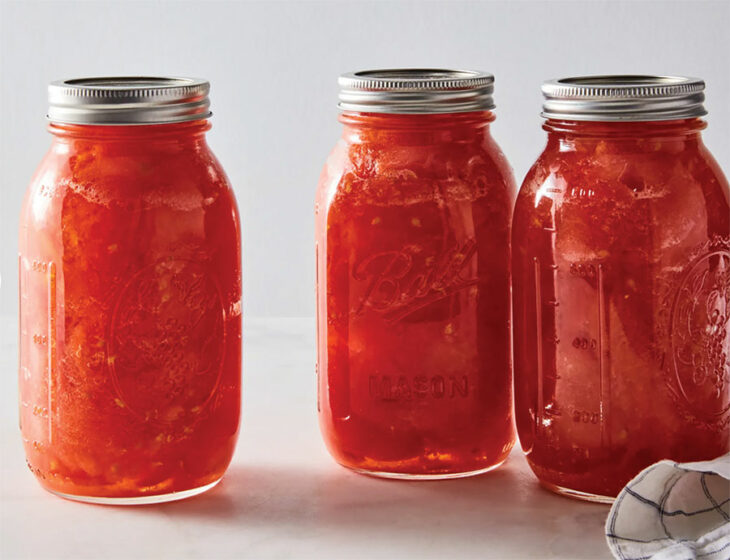
GRANDMA’S CANNED TOMATOES
- 12 pounds ripe tomatoes
- 4 teaspoons Kosher salt
- 4 tablespoons bottled lemon juice
- 4 sterilized quart jars with lids and rims
Cut an X into the bottom of each tomato, which will make peeling easier. Boil a large stockpot or lobster pot of water, and add all tomatoes — working in batches if necessary. When their skins begin to retract after a minute or so, remove the tomatoes from the water and plunge into cold water to stop the cooking and loosen the skins.
Peel off the tomato skins and cut out the stems. Press the peeled and cored tomatoes firmly into the sterilized jars until there is only one-half-inch remaining at the top. Once the jars are filled, add a teaspoon of Kosher salt and a tablespoon of bottled lemon juice to each quart.
Place the lids and rims on the jars and tighten.
Prepare a large boiling water bath in a stockpot or lobster pot, making sure the water is deep enough to completely cover the jars. Once the water has come to a boil, arrange the jars on a wire jar rack and lower into water. Allow the jars to process in the water bath for 45 minutes.
When the processing is complete, carefully remove the rack and place on a heat-proof surface. Cover the jars with a clean dish towel and allow them to cool at room temperature for a few hours.
Test the seals to ensure proper processing. Label the jars with the date, and store them in a cool, dark place (like a pantry) to enjoy for up to a year. — Recipe from www.food52.com/
RED HOT PICKLES
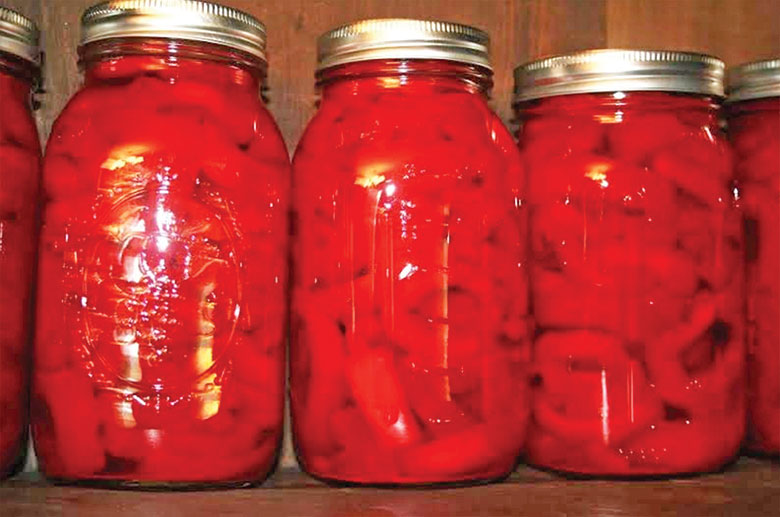
- 7 pounds cucumbers
- 1 cup pickling lime
- 1 cup vinegar
- 1 bottle red food coloring
- 1 tablespoon alum
- 2 cups vinegar
- 10 cups sugar
- 8 cinnamon sticks
- 1 package Red Hot candies
Day 1: Peel cucumbers and slice about one-quarter to one-half inch thick and remove seed. Place in a gallon jug. Add pickling lime and water to cover. Soak for 24 hours.
Day 2: Wash cucumbers off and soak in ice water for three hours. Place cucumbers in a glass Dutch oven. Add enough water to cover. Simmer for two hours: Pour off into a 3.5-liter glass pot for 24 hours.
Day 3: Pour off juice and bring to a boil. Pour juice back onto the cucumbers, and let them sit for 24 hours.
Day 4: Pour off juice; bring to boil. Put cucumbers in jars. Pour juice over cucumbers to cover and seal. Use only glass containers.
Note: Be sure to de-seed cucumbers well. — My late grandmother’s recipe; similar recipe can be found at www.tasteofsouthern.com.
CANNING: WHAT YOU’LL NEED
Here’s a list of essential supplies:
- Canning jars – These come in four sizes, depending on what is being made. Four-ounce jars are good for jellies and jams, as are half-pint ones. The pint and quart jars work well for fruits and vegetables. The jars also come in wide-mouth and regular. Use wide-mouth for large pieces of fruit or vegetables.
- Canning lids – These come in two pieces, a lid and a rim. Word to the wise: Do not keep rims on jars that have been canned. The rims can rust.
- Water bath canner or a large pot with lid and a jar rack. The rack is a must because jars that rest on bottom of the pot can crack.
- Jar lifter – This is great for lifting hot jars out of a water bath or pressure cooker — no burned hands.
- Swizzle stick or chopstick – Slide stick inside the jar edge to get rid of air buttles.
- Timer
- Wooden spoon – For stirring vegetables and fruits
- Tongs – Can prevent burns when removing rims or lids.
- Strainer or cheesecloth
- Ladle – For spooning vegetables and fruits in jars to begin canning — less mess
- Oven mitt for handling hot jars and lids —
Not essential, but good to have:
- Canning funnel keeps counters and jars clean.
- Phone a friend to help with the process. There’s a lot to be done.
Remember, canning takes time. Do not start a canning project on a weeknight when short on time. Save canning for the weekends when there is more time and less stress.
Andrea Yeager is a freelance writer living in Gulfport.