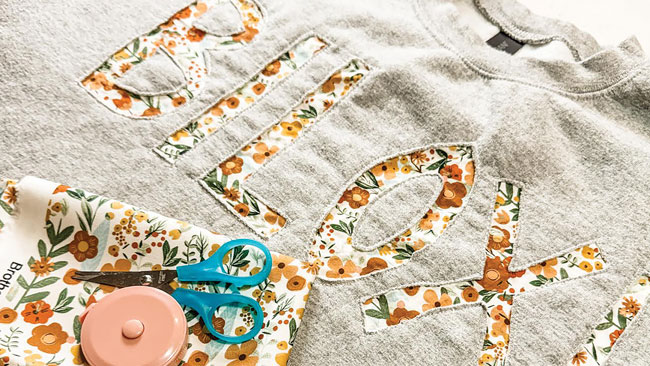
Reverse appliqué is a fun, forgiving way to add personality to a plain crewneck sweatshirt, no perfection required. Instead of layering fabric on top, this technique reveals a hidden fabric underneath, creating texture, contrast and a handmade look that feels both modern and nostalgic.
It’s a great project for beginners because mistakes often blend right in, making it ideal for learning without pressure. While a sewing machine makes the process faster, reverse appliqué also can be done slowly and beautifully by hand with just a needle and embroidery thread. This makes it accessible whether you’re at a craft table, traveling or simply sewing without electricity.
In this project, we’ll walk through both methods so you can choose which works best for you. The result is a cozy, custom sweatshirt that looks thoughtfully designed and completely one-of-a-kind.
 SUPPLIES:
- Crewneck sweatshirt (thrifted or used is fine)
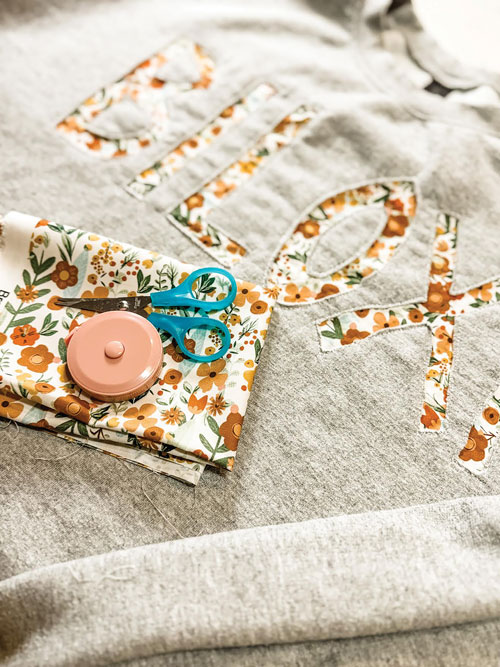
- Scrap or coordinating fabric (I used a fat quarter from Hobby Lobby)
- Tearaway stabilizer (optional)
- Scissors
- Ruler or straight edge
- Chalk or washable fabric marker
- Pins
- Sewing machine or embroidery needle and embroidery thread
Step 1:
Sketch your design: Keep it simple; letters, hearts, florals or basic shapes work best for beginners. I hand-sketched my design on the front of my sweatshirt using a fabric marker, making sure I was centered with the collar of the shirt. You also can trace your shapes or print them using iron on washaway fabric paper. Place pins around your design so you know how much backing fabric to use.
Step 2:
Place the backing fabric: Turn the sweatshirt inside out and pin the scrap fabric behind the area where your design will be. Make sure the fabric is placed where the good side will show when you cut away the sweatshirt. Use pins along the edges to keep the fabric in place. You can use a stabilizer if you want extra hold while sewing.
Step 3:
Stitch the outline: Flip the sweatshirt back over. Using a straight stitch or small zigzag stitch, sew directly over the drawn lines. If you’re using embroidery thread, follow the same steps.
Step 4:
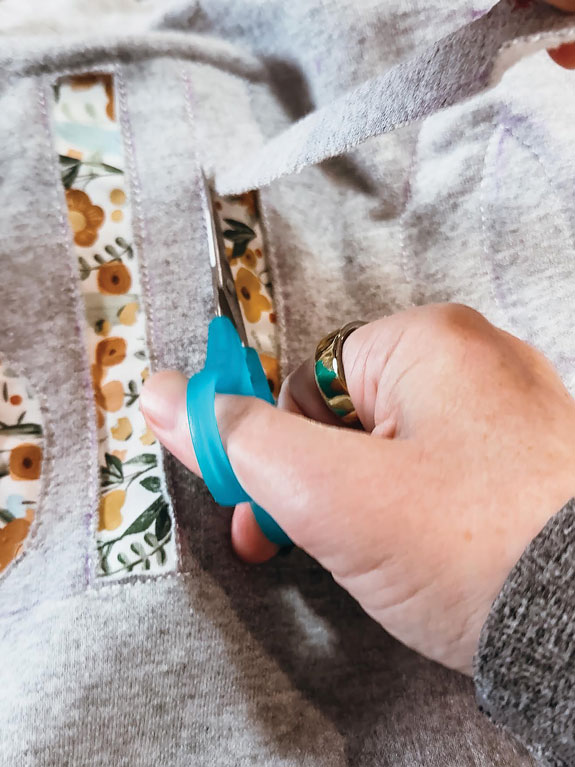 Cut the top layer: Carefully snip inside the stitched design, cutting only the sweatshirt layer to reveal the fabric underneath. Be careful not to cut the stitches or your design will unravel.
Step 5:
Finishing touch: Cut away any extra fabric or stabilizer on the inside of the sweatshirt.
TIPS
This method can be used on any piece of clothing or even canvas tote bags. Just make sure the fabric you choose does not fray too much. Sweatshirt and t-shirt material are always a good option.